Setting up SSO in Supplios using Microsoft Entra
Supplios supports Single Sign-On (SSO) with a variety of Identity Providers. This allows your users to authenticate with a SSO / Identity Provider that your company already uses for user access control.
SSO sign-in options can be configured independently for your internal and/or your supplier users. The most common use-case is to setup SSO for your internal users (integrating with the Identity Provider you already use for your employees) then having your supplier users use the standard Supplios authentication system (email/password) together with optional "public" SSO options such as Google or other other Microsoft login options.
Microsoft Entra (formerly known as Azure Active Directory) is a common SSO / Identity Provider used in enterprise IT environments, and Supplios supports using Entra as a SSO provider via the OAuth 2.0 standard. (Depending on your company's specific plan or other commercial arrangements)
Scope of this article
Integrations with Identity Providers such as Microsoft Entra can involve two separate, but related functions:
- Single Sign-On (SSO) — the actual user sign-in process via the Identity Provider (such as Entra). This is the focus of this article.
- User Sync / Directory Sync — the automatic syncing of users from one system (such as Entra or Active Directory) to Supplios, including automatic provisioning/de-provisioning of user accounts. This is usually done using a standard such as SCIM. This is an separate/additional feature from SSO, and is only setup on a custom basis. It is outside the scope of this article.
Supplios can support both such integrations, but this article is targeted at SSO specifically. For User Sync functionality (SCIM), please discuss in more detail with your Supplios account manager.
Overview of setting up Microsoft Entra SSO integration:
Setting up SSO with Microsoft Entra involves some one-time tasks on your side (in your Microsoft admin area), and some one-time tasks done on the Supplios side, performed by the Supplios technical support team.
The steps on your side (outlined below) are typically done by someone in your IT department.
For any questions on the Supplios side, contact support@supplios.com or contact your account manager.
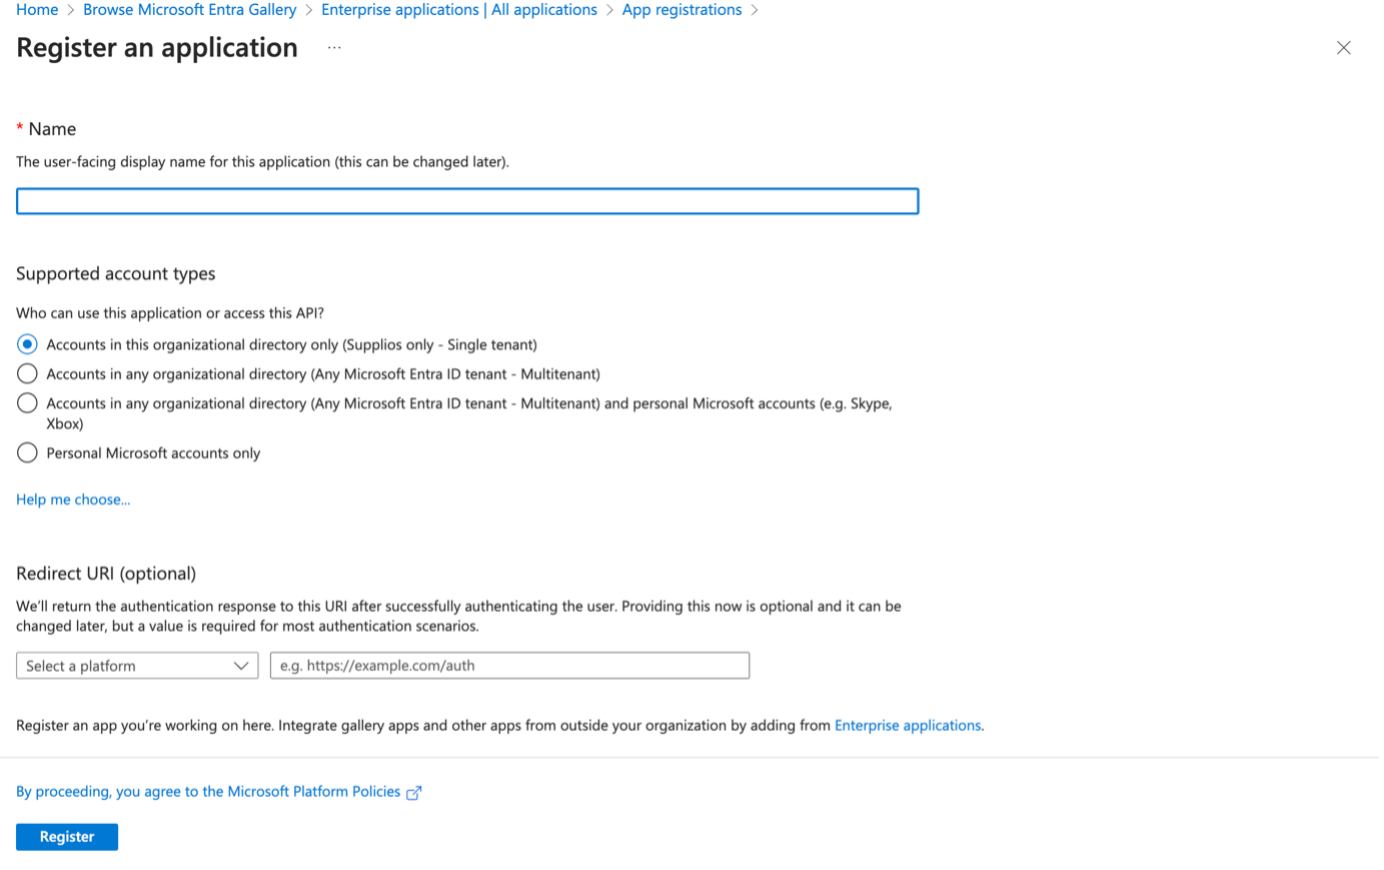
Step 1: Create new application registration in Microsoft Entra
- Enter a name for your application that identifies it for users. We suggest using something like "Supplios".
- Select the account types that can log in to Supplios. We recommend choosing
Accounts in this organization directory onlyto enhance security. - Set the Redirect URI:
- Platform: Select
Web. - Redirect URI: Enter the unique URI provided by Supplios for your application. (Ask your Account Manager or support contact)
- Platform: Select
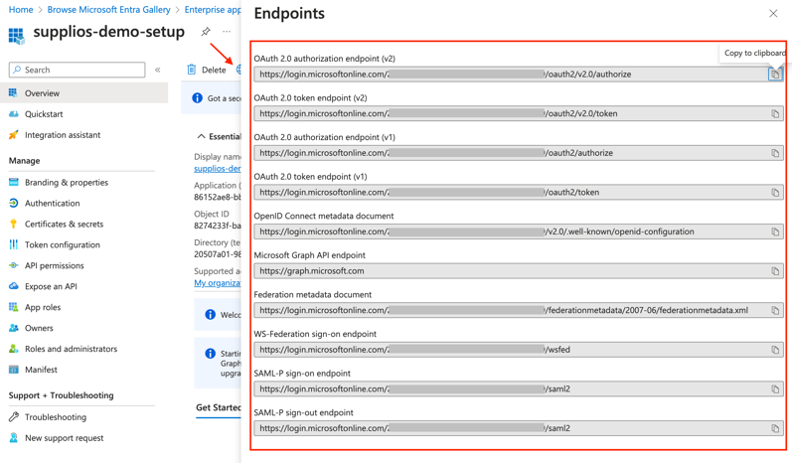
Step 2: Provide Necessary Information to Supplios
After completing the application registration, send the following details to Supplios:
- Endpoints: Provide the endpoints for your application integration. The endpoints visible to you may look different from the image below, depending on your organization's Microsoft account. Supplios typically needs to know the "Authority URL".
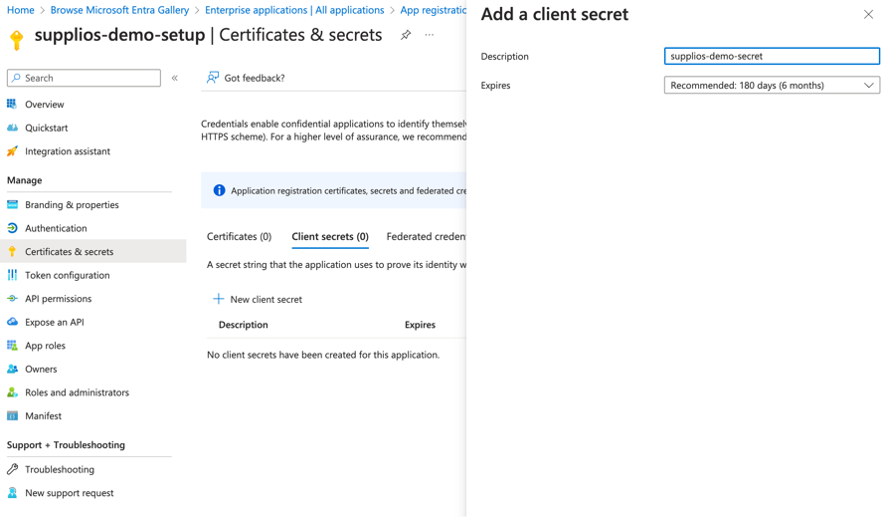
- Credentials (Client Secrets): Create a Client Secret to provide to Supplios. This will be used by the Supplios application during the authentication flow. You can select an expiration period that is suitable to you, but please note the expiration date so a new Client Secret can be provided to Supplios before it expires, or else your users will be blocked from logging in.
NOTE: The Client Secret is sensitive information. Do not share this with others, other than a single contact at Supplios.
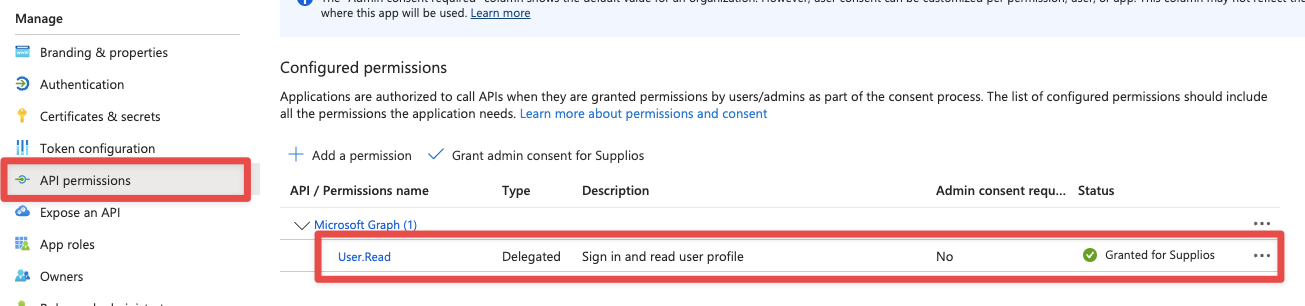
Step 3: Ensure the User.Read API permission is authorized
Supplios must be able to read the user profile during the login flow to get things like the email address.
In the "Manage" section of the Entra App Registration page, click on "API permissions".
Ensure that the app registration is granted the User.Read permission as shown below.
Step 4: Ensure user attributes are configured correctly
To ensure proper SSO setup, we need specific user attribute information to be set as expected:
- User Identification Attributes: Ensure that the user profiles assigned to the Supplios app registration are complete. As of 2024 (and still the case in 2025), the default configuration in Entra maps the unique identifier to the
userPrincipalName, which is also the user's email address. Supplios will use this field by default to determine the email address of your users. This is required for the integration to work. - Custom Settings: If your configuration uses different settings that those above, send us the names of the email address and unique identifier attributes so we can map them to the correct values in the Supplios app.

Important Notes
- User Profile Completion: Make sure each account assigned to the Supplios app registration has a complete user profile. This is critical for the correct mapping of user attributes.
- Attribute Verification: Verify that the user profiles include the correct email address and unique identifier as configured in your Microsoft Entra setup.
Final Steps
Once you have sent all the required information outlined above, Supplios will complete the setup on our side:
- Integration Setup: Supplios will set up the SSO integration using the provided details.
- Confirmation: We will notify you once the setup is complete.
- User Access: Invited users will then be able to log in to Supplios using SSO.
- Transition from Email/Password to SSO: Supplios can help you manage the transition process from Email/Password login to SSO login by disabling new user registration using Email/Password before disabling login. The support team can help you through this process.
Questions?
Please contact our technical support team at support@supplios.com or use the contact form in these support pages.