Responding to a Sourcing Event (RFQ, RFP, RFI)
This is a quick guide to help suppliers who have been invited to respond to a Sourcing Event in Supplios by a host company.
A Sourcing Event is another name for an RFQ, RFP, RFI, or Tender.
Invitations to Sourcing Events
When you are invited to a Sourcing Event (RFQ, RFP, Tender, etc.), you will receive an invitation email which has a link to the Sourcing Event details, along with information about the deadline, if set.
If you do not yet have a Supplios account, you will be also receive an email notifying you how to complete the registration process and set your password.
Invitations to Sourcing Events are sent to each person at your company individually, as selected by the buyer from the host company. The buyer can choose to include multiple people from your company, or they can send it to only one person. Any of the people the buyer includes can respond on behalf of your company.
If you receive an invitation to a Sourcing Event and you would like to delegate the response to a colleague who is not already invited, we provide the ability to do this once you have logged in. Do not just forward the email to your colleague unless you know they were also included on the invitation.
If you miss the invitation email for a Sourcing Event, there is a list of all Sourcing Events you have been invited to on your dashboard after you log in.
Viewing the Sourcing Event Details
To see the details of the Sourcing Event, follow the link in the invitation email, or click on the list of Sourcing Events on your dashboard.
This takes you to the Sourcing Event details page, which provides an overview of the RFQ / RFP / RFI from the buyer, links to download any relevant files, and directions for how to respond, and how to ask questions, if needed.
An example is shown below highlighting the key areas:
- Event details & files — view a summary of the RFQ/RFP and download any relevant files
- Action buttons — click these to start your response, decline to respond, or ask questions
- Messages tab — click here to send questions or messages to the buyer if needed (also available after you start your response)

Responding to the Sourcing Event
To respond to the Sourcing Event, click on the green "Start Response" button on the right side of the Event detail page. Click again to confirm if prompted.
If you need to delegate the response to a colleague, you should also click "Start Response" — on the next page you will have the option to add your colleagues.
You will then see a screen showing the step-by-step process for submitting your response.
Step 1: Contact Information
On this tab, your contact information is displayed, along with a list of all the people at your company who have access to this Sourcing Event.
If you need to add or remove people from this Sourcing Event, do so here.
If you do not need to add or remove others from your company, there is no need to do anything on this page.

When ready, click on the green "Next Step" button.
Step 2: Response Forms
This tab shows a list of all the Response Forms you need to complete for this Sourcing Event.
Each items shows whether it is required or optional, the completion status, and a button for starting or completing it. Click on the green "Start" button for each one to open the Response Form.

There are different types of Response Forms. It is up to the buyer to decide which ones are relevant for each Sourcing Event. The main types are shown below.
Form
A "Form" is a simple list of questions that you need to fill in. These could be text-based answers, multiple-choice questions, etc.
Quote Sheet
A "Quote Sheet" is typically used in RFQs to gather specific quotes for a list of items. The cells required to be filled-in by you are shown in yellow. You must either fill in all cells in yellow, or select "No Bid" (if allowed) on a line, before you can submit.
Document Upload or Document Template
A "Document Upload" is used when the buyer needs you to provide a document such as a copy of a certification, an insurance document, or similar. Follow the instructions to upload the requested document.
A "Document Template" is used when the buyer needs you to fill-in a specific document such as an Excel file, or similar. Download the provided document, complete it as required, and upload your modified version as requested.
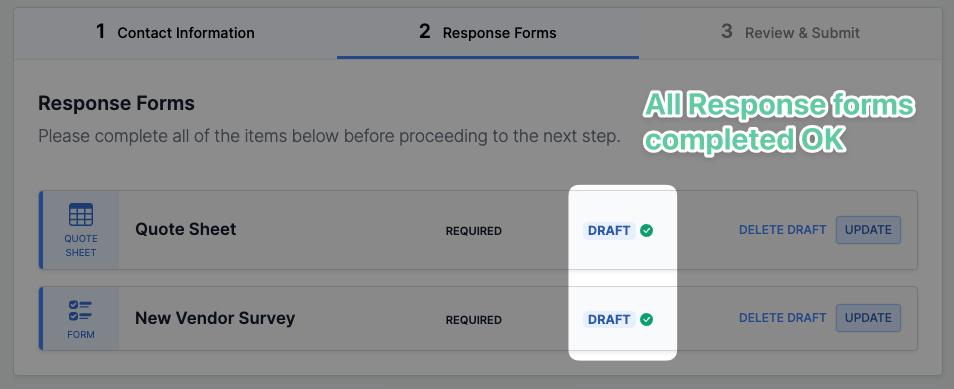
Once you have completed all of the Response Forms, there will be a green check-mark shown on each one.
If any are not completed correctly, or incomplete, they are shown with a red icon.
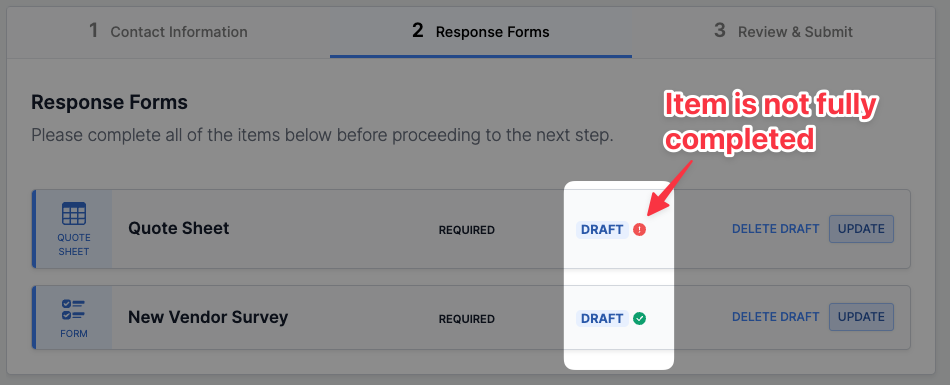
Make sure all required items are completed correctly, then click on "Next Step".
Step 3: Review & Submit
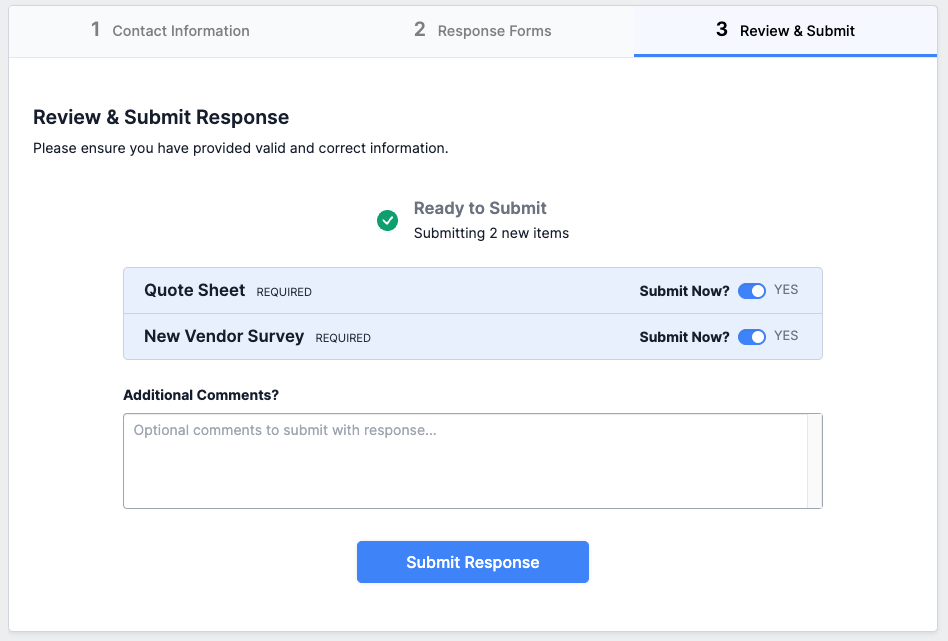
Once you have completed all Response Forms and click on "Next Step", you are taken to the Review & Submit tab.
This will show a list of all the Response Forms that are ready to be submitted. If all required items are ready to submit, you will see a large green check-mark icon at the top of the list.
If any required items are not ready, you will see a red icon, and the incomplete item(s) will be indicated.
If some Response Forms are optional and you do not want to submit them yet, you can toggle "Submit Now?" to No. But in most cases you will just leave it as Yes, which is selected by default.
You can add an optional "Additional Comment" — this will be shown to the buyer together with your submission.
Once ready, click on "Submit Response" and wait for the page to respond.
Once you have submitted your response successfully, you will see the "Success" message. This means that your submission is complete, and the buyer has been notified. There is no other action needed on your part at this time.
You also have an opportunity to download a copy of your submission in Excel format. This Excel version is simply for your own records — all of your submission data is safely stored in the supplier portal and passed on to the buyer.
At this point, you can click "Go To Dashboard" to perform other tasks in the supplier portal, or you can close the window, and/or logout.

Asking Questions to the Buyer
If you have questions when viewing the Sourcing Event details, or when preparing your response, you can click on the "Messages" tab just under the title of the Sourcing Event.

From the Messages page, you can directly send message to the buyer (buyer team). Click on "New Message", then write your message and hit "Send Message".
This will send an email to the buyer / buyer team with your question. They will be able to see it was sent by you, and the specific Sourcing Event it is related to, so you do not need to provide this information.
When they reply, you will receive their message via email, and it will also be visible on this same Messages page (in this specific Sourcing Event) so you can see a full history of the questions you asked, and the buyer replies.
You are able to respond to their messages from your email client (Outlook, Gmail, etc.) or from this Messages page.
All email notifications and messages from the buyer are sent through the Supplios platform (with an email address such as company@relay.supplios.com). If you are not receiving the messages, please make sure relay.supplios.com is an allow-listed (white-listed) email domain in your company's IT / email system.